This setting is accessible by Organization Admins, Billing Admins and User Admins only!
This setting can be accessed from the Organization Settings navigation menu under the menu item, Admin settings.
From this setting, you can:
In an Organization, there are different roles that will allow for different restrictions and accessibility across organization settings.
The table below summarises the available roles and their respective accessibilities.
Organization Role | Description | General Settings | Users Settings | Spaces Settings | Billing Settings |
|---|---|---|---|---|---|
Admin | Organization Admins have access to all spaces and they can manage organization settings, Users and billing. | ✅ | ✅ | ✅ | ✅ |
Billing Admin | Billing Admins are allowed to manage organization billing. | ✅* | ✅* | ✅* | ✅ |
User Admin | User Admins are allowed to manage Organization Users and Workspaces. | ✅* | ✅* | ✅ | - |
Member | Organization members are allowed to access Workspaces within an Organization when given permission to do so. | - | - | - | - |
* Limited Access
An Organization Admin has the most comprehensive access to the Organization as he/she can manage everything within an Organization.
As an Organization Admin, here's what you can or can't do:
✅ Access to all organization settings
✅ Manage the Organization's information
✅ Manage the Organization's billing information
✅ Manage all Organization Users
✅ Manage all Workspaces
✅ Manage the Organization's subscriptions
✅ Cancel Subscription
✅ Delete the Organization
Every organization requires at least one Organization Admin. However, we highly recommend having more than one Organization Admin to ensure smooth operation and avoid any potential delays if a single admin forgets their credentials or leaves the company.
For enhanced security, explore the settings available on our platform here.
The Billing Admin can manage the billing information, make changes to the subscription, edit payment details and view invoices.
As a Billing Admin, here's what you can or can't do:
✅ Access to all organization settings
✅ View the Organization's information
✅ Manage the Organization's billing information
✅ View all Organization Users
✅ View all Workspaces
✅ Manage the Organization's subscription
❌ Cancel Subscription
❌ Delete the Organization
User Admin can manage the Users and Workspaces within an Organization.
As a User Admin, here's what you can or can't do:
❌ Access to all organization settings
✅ View the Organization's information
✅ View the Organization's billing information
✅ Manage all Organization Users with the following limitations:
Add Member role Users
Delete Member role Users
Edit assigned Workspaces of all Users
✅ Manage all Workspaces
❌ Manage the Organization's subscription
❌ Cancel Subscription
❌ Delete the Organization
An organization member has no access to organization settings. Their access is only limited to the Workspaces they are granted access to.
Here, you will be able to see the list of existing Users in the Organization. If they have not accepted your invitation, their last active time will be shown as 'Pending' instead.

The user profile consists of the User's profile avatar, display name, organization user role and email address.
The time beside the Action button shows the User's last sign-in time on the platform. This is useful for monitoring purposes.
Actions that can be carried out here include:
Tip: Use the Search function at the top to quickly find the user that you are looking for.
The following features are only available to Organization Admins and User Admins!
Step 1: Navigate to Users Settings
Go to Organization Settings > Admin Settings.
Step 2: Press ADD USER
At the top bar, press the blue ADD USER button and the Add User dialog should open up.
Step 3: Fill in the email address
Enter the email address of the User that you wish to invite into the Email Address field.
Step 4: Select Organization Access
Select appropriate Organization access for this new User.
Learn more on Organization Access.
User Admins can only add Users with Member access to prevent misuse or unauthorized actions.
Step 5: Submit the details
Once you have filled out the fields, click the blue NEXT button on the bottom right.
An email invitation will be sent to the User's email address that you entered. The new User will have to click on a link embedded in the email invitation to gain access to the Workspace.
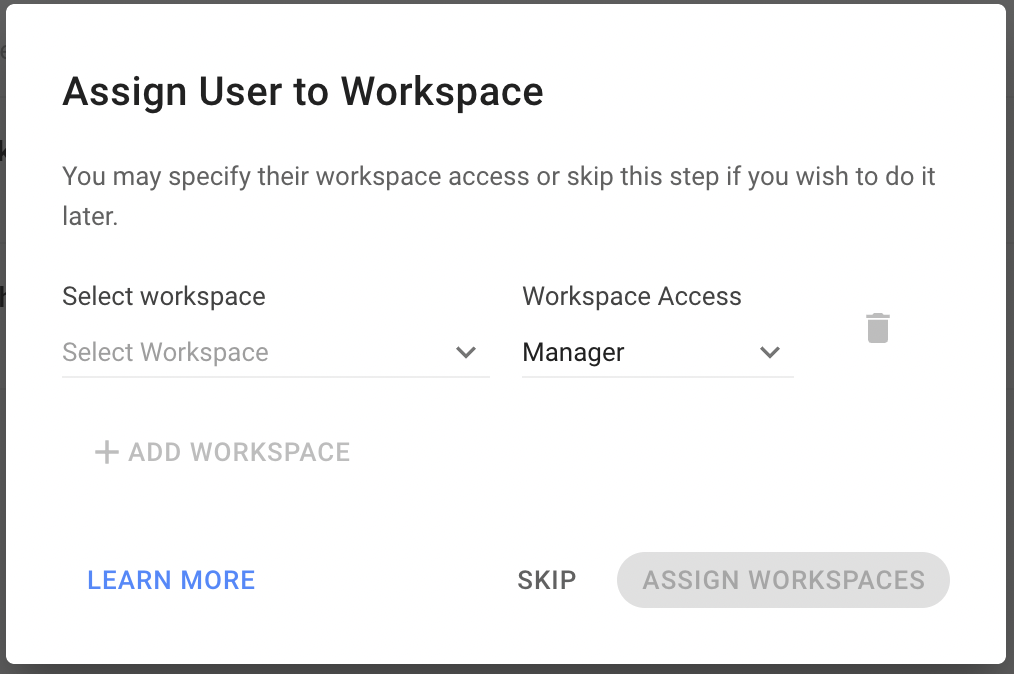
Step 6: Assign this User to Workspace(s)
After the User is created, you can assign this User to the Workspaces within the Organization. Add the relevant Workspaces and press ASSIGN WORKSPACE when you are ready. You can skip this step if you wish to do it later by pressing SKIP.
You can only assign a User to 10 Workspaces at this point. If you wish to assign them to more Workspaces, please add the User from the respective Workspaces.
Step 1: Access Admin settings
Go to Organization Settings > Admin Settings.
Step 2: Search for User
Search for the User’s name and select Edit.
Step 3: Update and save details
Make the necessary changes and select Save.
Note:
1. Billing Admins can only view Users and cannot make changes.
2. User Admins cannot promote or demote members to prevent unauthorized actions.
Users cannot delete themselves; another authorized User must perform this action.
Step 1: Access Admin Settings
Go to Organization Settings > Admin Settings
Step 2: Search for User
Search for the User’s name and select Delete.
User Admins can only delete Users with Member access to prevent misuse.
Step 3: Confirm deletion
Review the details and select Delete to continue.
What happens after deletion:
- The User loses access to all Workspaces.- All their assigned Contacts in Workspaces will be unassigned.
To change a user’s email, add a new user with the new email and provide them with the same access level as the user with the email you want to change.
Learn how to add a new user here. If an email is obsolete, you can delete the user by following the instructions here.


Related articles 👩💻

