In this article, you’ll learn how to identify VIP Contacts to provide a tailored customer experience and differentiate them from non-VIP Contacts.
Treating VIP Contacts differently ensures a more personalized and expedited service. This can lead to enhanced customer satisfaction and loyalty.
Having a different route for VIP contacts allows businesses to efficiently allocate resources, ensuring that highly skilled agents cater to VIP customers’ unique needs.
Learn how to use the Workflow Template to identify and route VIP Contacts.
Check Contact for an existing email
If Contact has an Email: Get Contact Data and Route VIP Contact
If Contact has no Email: Ask for Email and Route Contact
In the Workflows module, click + Add Workflow > Click Routing: VIP Contacts > Click Use Template.
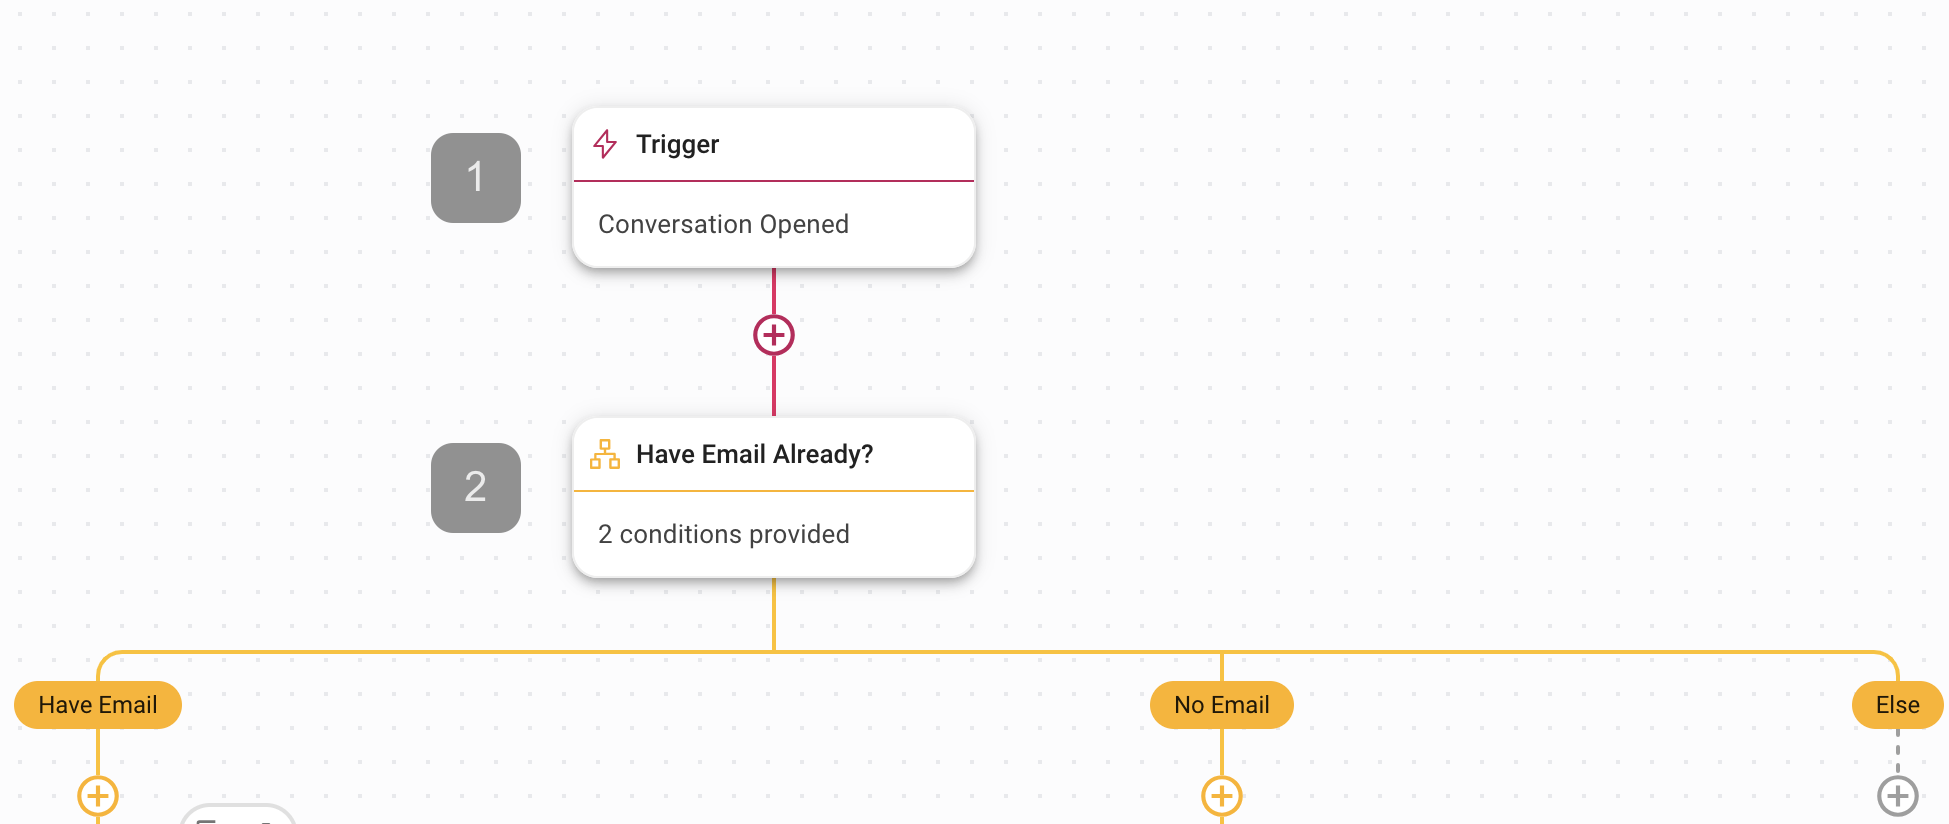
1. Trigger: The Workflow starts when a conversation is opened by a Contact.
2. Have Email Already?: This Branch step checks if the Contact has an email or not in the Contact’s Email Address field.
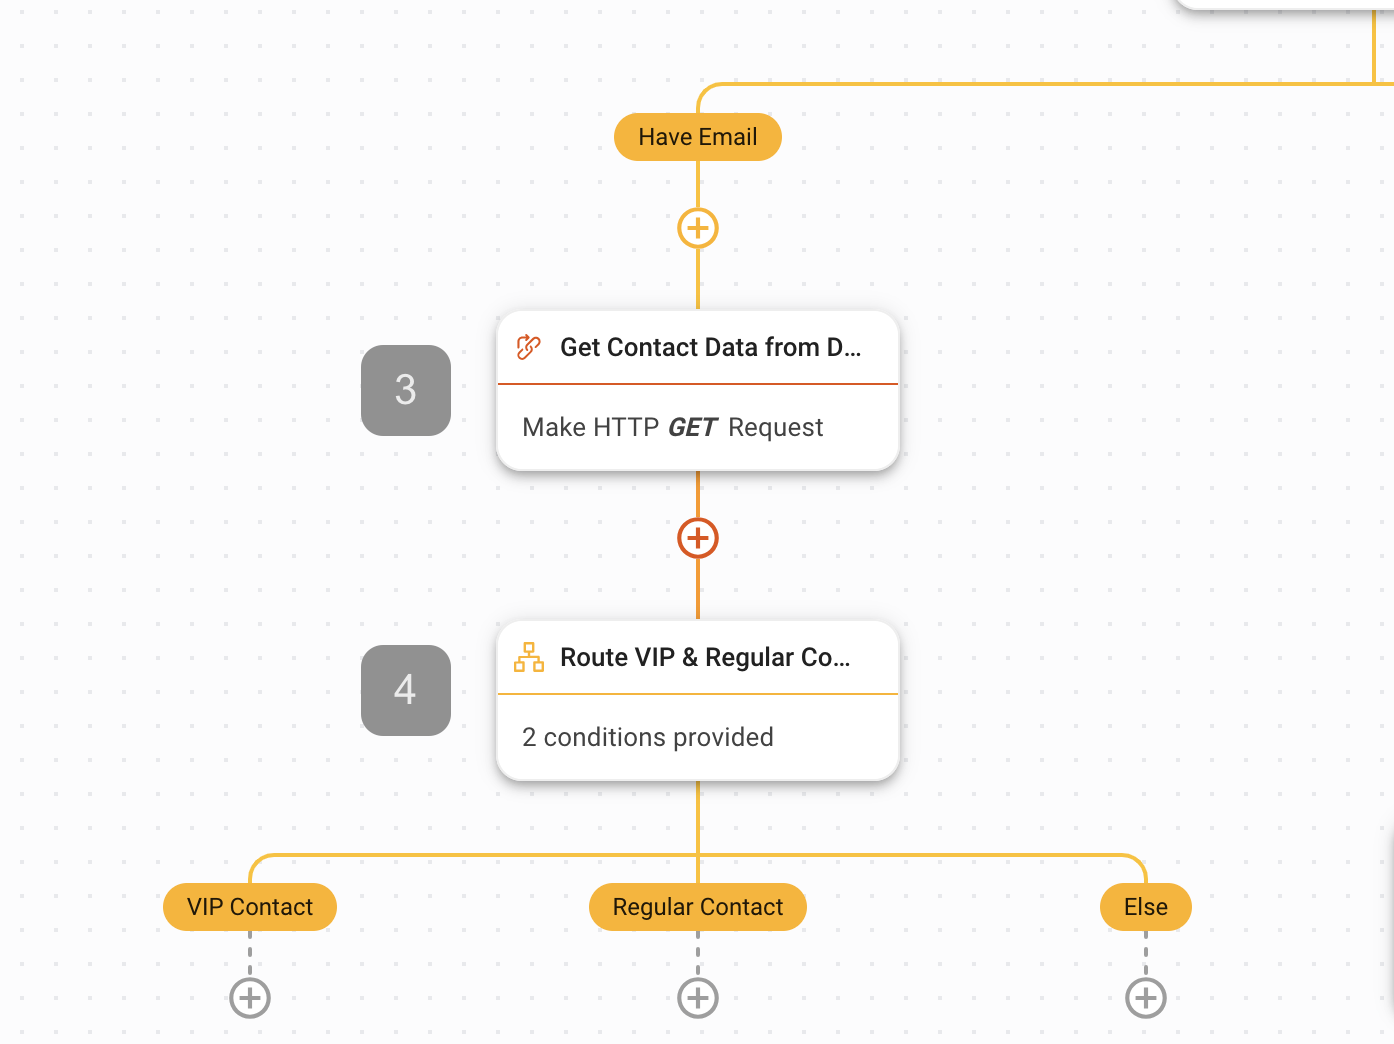
If the Contact has an Email in the Contact’s Email Address field, the Contact will be routed to the Have Email branch. In this branch, the Contact’s data will be retrieved from an external CRM or data warehouse via a HTTP request step to identify if the Contact is a VIP. If the Contact is a VIP, the Contact will be routed to the VIP Contact branch.
3. Get Contact Data from CRM or Data Warehouse: This is an HTTP request step that will retrieve the Contact’s details from a data warehouse such as a CRM. Click on the Workflow step to configure the Method, URL, and Header to retrieve the Contact’s data.
In the Response Mapping section, map the $.customerType(name of key from the response based on your CRM or Data Warehouse) key to store its value as a variable named CustomerType. Learn how to configure HTTP request step here or get a developer to assist with this configuration.

4. Route VIP & Regular Contact: In this Branch step, the Contact will be routed based on the CustomerType variable. If the CustomerType is VIP, it will be routed to the VIP Contact branch. If the CustomerType is not VIP, it will be routed to the Regular Contact branch.
Here are steps to consider after Routing VIP and Regular Contacts:
VIP Contact: Add an Assign To step to assign to a specific user or dedicated agent to attend to the VIP Contact.
Regular Contact: Add an Assign to step to assign to a user in a team or Workspace with an assignment logic that fits your business needs. Learn more about Assignment Strategy: Contact Distribution & Load Balancing.
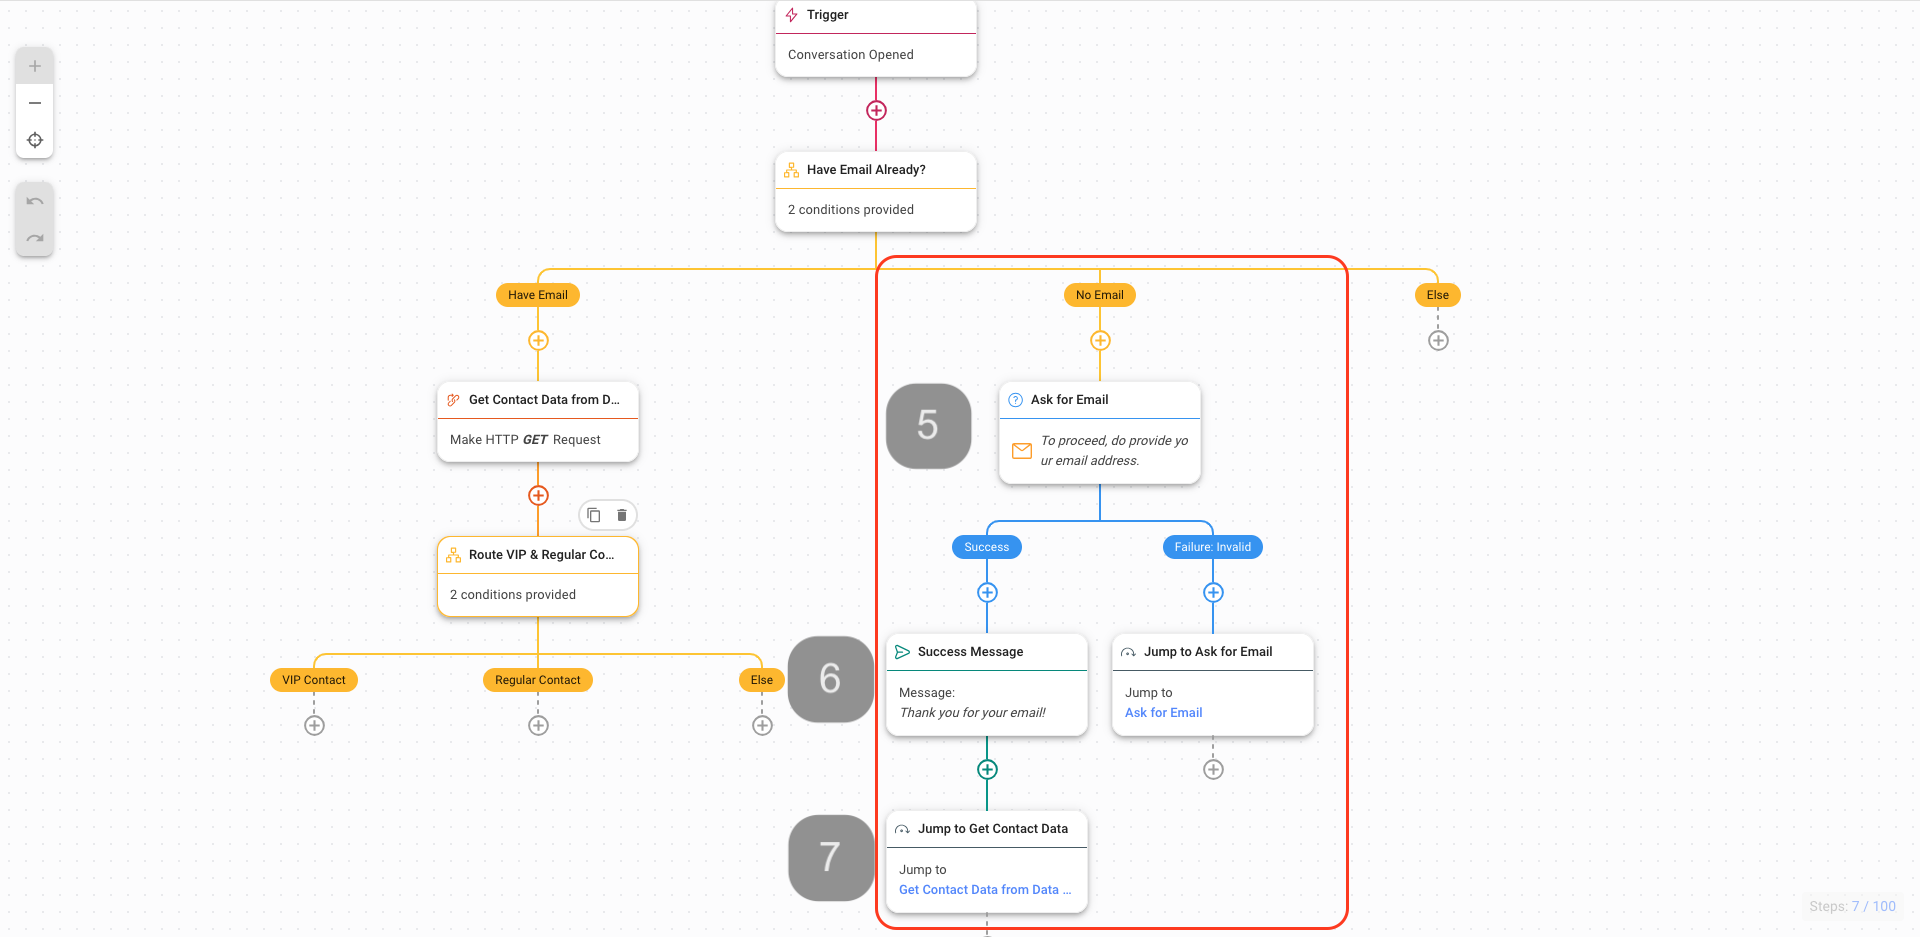
If the Contact does not have an Email in the Contact’s Email Address field, the Contact will be routed to the No Email branch. In this branch, the Contact will be prompted with a question to ask for their email. Once you have received the Contact’s email, a Success Message will be automatically sent and the Workflow will Jump to Get Contact Data where the Contact’s data will be retrieved from an external CRM or data warehouse via a HTTP request step to identify if the Contact is a VIP. If the Contact is a VIP, the Contact will be routed to the VIP Contact branch.
5. Ask for Email: Ask for the Contact’s email with the Ask a Question step.
6. The Ask for Email step can have a Success or Failure outcome:
Success Message (Success): Once you have received the Contact’s email, the automation will send a Success Message to the Contact.
Jump to Ask for Email (Failure: Invalid): If the Contact sent an invalid response to the Ask for Email question, the automation will jump back to the Ask for Email step up to 3 times. By the 4th time, if the response is still invalid, you may consider routing to an agent or a manager to manage this Contact.
7. Jump to Get Contact Data: After sending a Success Message, the Workflow will continue by getting Contact’s data and identifying if the Contact is a VIP using a Jump to step.
Once you have completed the setup, click Save and Publish to activate the Workflow.


Related articles 👩💻

