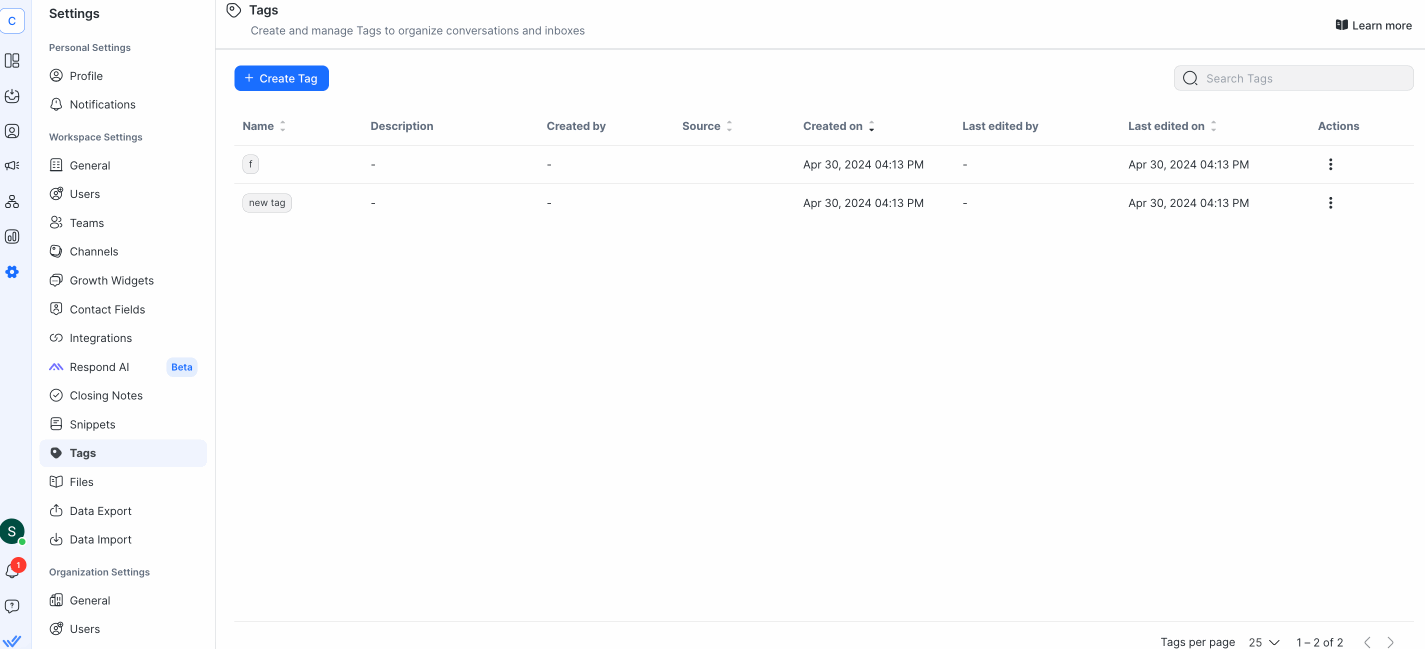
Access this feature from your Workspace settings under the Inbox settings sub-menu item, Tags.
You can add, edit and delete Tags from the Tags page.
To create a new Tag, click the Create tag button.
On the Create tag dialog, provide the following information:
Field | Description |
|---|---|
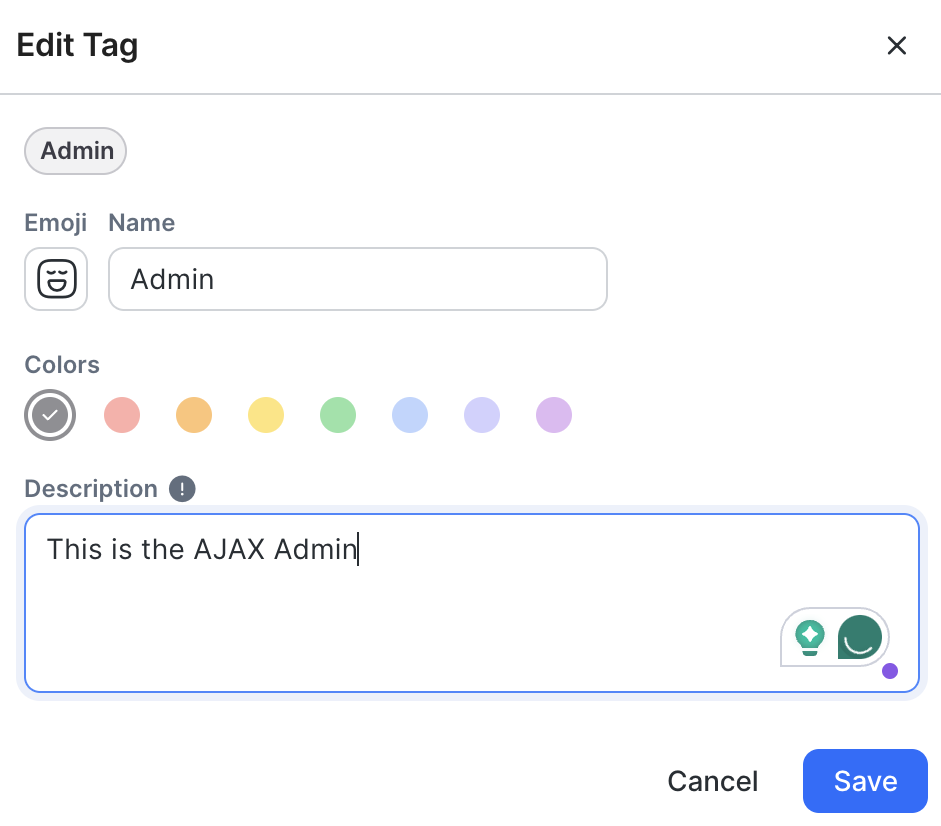
Emoji | Click the emoji icon and select an emoji from the list that displays. |
Name | Provide a name for the Tag. |
Color | Select a color for the new Tag. |
Description | Describe your Tag here. This description is displayed when you hover over the Tag in the Inbox module for guidance. |
Once added, you can use the Search Tags field to search for a Tag that you want to edit or delete.
From the Actions menu, select Edit to edit the Tag you are interested in. Update your Tag on the Edit Tag dialog box and click Save to save your edits.
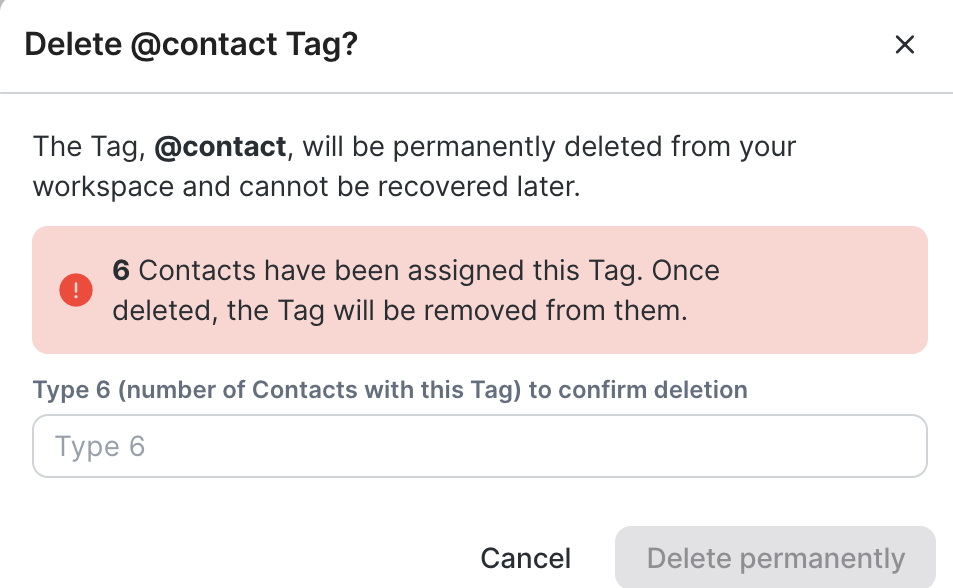
From the Actions menu, select Delete to delete the Tag you want to delete. On the dialog that displays, enter the number of Contacts assigned to this Tag in the text area to confirm deletion and click Delete permanently. The Tag is permanently removed from all Contacts with this Tag on the platform. This may affect Contact segments and workflows.


Related articles 👩💻

